Writing An Android Portrait Camera App
Description
Recently I have worked on a custom camera Android project at CNature.
The project had 4 main requirements:
- The camera has to work in portrait mode even if the phone is on landscape mode.
- The camera has to be on the entire screen on any Android device.
- The final picture has to be cropped relatively to a square in the UI (see bellow).
- The final picture has to be resized to a specific size which can be controlled from a configuration file.
At the begging it seemed like a straightforward task, however, it wasn't that straightforward at all.
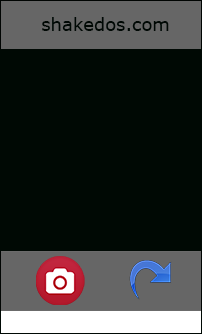
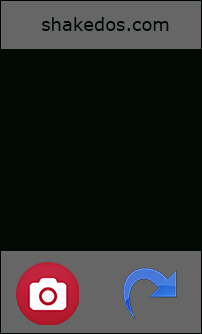
In order to give the reader a taste of what was needed to be done, I would like to share a sample of the application's UI:
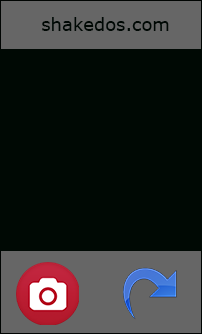
It might be smart to note that the camera preview is also in a full screen mode, therefore it has to be behind the header and the footer while shown inside the square.
It's worth mentioning that at the moment we use the camera API and not camera2. I assume that this will be changed in the future, but for now, it was more important to support old Android devices, which usually use old Android versions, than supporting the new API.
Challenges
As I am not an Android user anymore I had to first work with the Android emulator while coding. Unfortunately, the Android emulator doesn't work the same as many Android devices. There are at least 3 things to consider while developing with the Android's camera:
- The emulator's both orientation and camera orientation behave differently than a regular device.
- Setting the correct preview size in order to support full screen preview.
- Relate between the size of the preview and the actual picture size so the cropping will be correct.
As well, it is also important to remember that sometimes backwards compatibility is required.
Before Starting...
I would recommend to visit my other posts about Android Camera Development Basics and Android Development and Threads. As well, I recommend to read about Activity Life Cycle.
I have also created a demo project which should contain the above requirements and the suggested solutions.
Suggested Solutions
Challenge #1
The emulator's both orientation and camera orientation behave differently than a regular device.
There are 3 orientation modes to consider:
- Device orientation
- Camera preview orientation
- Picture orientation
Device Orientation
In order to confront this challenge first we need to make sure we can set the device's orientation which can be done both via XML or programmatically:
XML requires one to add android:screenOrientation="portrait" to the activity in the AndroidManifest.xml. For example:
<activity android:name=".ActivityName"
          android:label="@string/app_name"
          android:screenOrientation="portrait">
Programmatically requires to add the following code in the onCreate activity's method:
setRequestedOrientation(ActivityInfo.SCREEN_ORIENTATION_PORTRAIT);
Camera Preview Orientation
By default, when taking a photo, the camera's orientation (in most devices) is set to landscape mode as this is the natural way of taking a photo therefore, in order to set up the preview to work in portrait mode the method setDisplayOrientation should be triggered with 90º:
camera.setDisplayOrientation(90);
The method must be triggered before the surface is created which means that it can be triggered no later than the execution of surfaceCreated
Unfortunately this won't be as easy as it seems. It seems like that the emulator doesn't behave the same and by doing the above the preview will end up in landscape mode. This means that there should be a way (in case one wants to use the emulator for testing) to differentiate between a regular device and the emulator. I wrote a quick hack in order to "fix" this issue which up until now proved its usefulness:
Then when triggering the setDisplayOrientation method, we would just use something like:
camera.setDisplayOrientation(Device.getOrientation());
Obviously this can be done better, but the point is kind of clear, right?
Picture Orientation
The picture orientation depends on your device's hardware. Basically the height of the picture suppose to be greater than the width but sometimes it can end up the opposite. In order to get the picture's size one has to use getSupportedPictureSizes() and then execute the getOptimalPreviewSize method:
This method is taken from Android's samples but is modified to support the portrait mode as I have changed the width and the height order in order to get the correct ratio.
After understanding the above, rotating the picture can be solved by using the following method which checks if the rotation is needed or not:
Challenge #2
Setting the correct preview size in order to support full screen preview.
Full screen preview can be tricky. Supporting full screen means that the width and the height of the preview's container might be bigger or smaller than the actual screen size. How do you make it work?
First, we need to create a preview view that will be responsible to set the camera preview. There are 5 methods that should be overridden:
- onMeasure - The preview view is going to be a child of the main layout so we should calculate it's size. Once we have the calculated size we can use it to get the best available camera preview.
- onLayout - Every time the layout is being changed we need to make sure that the rest of the UI (Preview and extra UI elements) adjust correctly.
- surfaceCreated - Simply we want to make sure that the camera's orientation is set and ready to display the preview.
- surfaceChanged - Every time the surface is being changed we need to make sure that we adjust the camera preview.
- surfaceDestroyed - Just make sure that the camera is closed.
Full preview code is available here
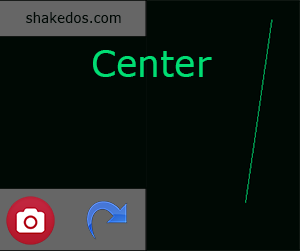
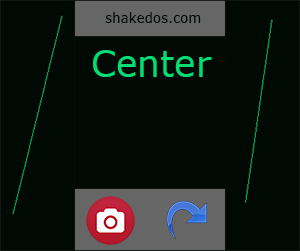
Now, we have to adjust the UI elements. To be honest, in this example the only UI element that we need to adjust is the footer. As you can see below, the footer might not fit the full screen size (while considering that the black part in the middle must remain as a square).
The white background above represents the actual full screen of the app which shows that the footer is not adjusted correctly.
Now, lets take a look over the setCameraLayout method:
In the code you can see that we are adjusting the footer using adjustFooterToFullScreen(screenHeight, lp);. This happens as a result of the camera preview changes which changes the layout and therefore requires us to make sure that the footer has the correct height.
Another thing, because the preview of the camera might be bigger than the actual screen, we would have to center it so the camera would fit the preview:
Centering would work by calculating the width and height and set it's gravity later:
lp.width = (int) (lp.width * scaleFactor);
lp.height = (int) (lp.height * scaleFactor);
lp.gravity = Gravity.CENTER;
sv.setLayoutParams(lp);
Challenge #3
Relate between the size of the preview and the actual picture size so the cropping will be correct.
As we know, the preview size and the picture size sometimes might be different depending on the device's hardware. In my project I had to crop the picture to the size of a square ImageView as mentioned above. Why is it actually so complicated? There are few points to consider:
- When the camera preview is set to full screen it means that the width and the height of the preview's container might be bigger than the actual screen size. This means that it might be a bit more tricky to find the right coordinates in order to crop the picture correctly.
- Probably in most cases, one will aim to have the biggest picture size as the picture's quality would be better. When we think about sizes we need to differentiate between the screen size, the view size and the actual picture size as they are not directly related to each other.
So cropping is done by using the following code (comments above the lines):
Summary
In my opinion there are more ways to solve these challenges. I am very curious about the Camera2 API, and hopefully I will be writing about it soon.
I am very disappointed that the Android emulator is not acting the same as any Android device you would expect it to be. I am not saying its bad, but I had more expectation, especially that I need more than one Android device to actually verify the application I am working on.
Comments & questions are always welcomed.

